December is finally here!! Time For some Christmas DIY!! Actually, I started my DIY Christmas decorations two weeks before Thanksgiving but who is counting . Since we are moving next year, I can’t go too crazy in our little one bedroom loft, but I certainly have a few things to add to this year. First up… boxwood wreaths! I love them! I love that you can use them in spring too. If you want real ones, Trader Joes has them for $9.99. I need ones that will last, and I was certainly not paying $79.99 at West Elm They also have ones at Target for $39.99 , but they weren’t really the shape I was looking for.
So THANK YOU MICHAELS for being the only place I could find boxwood garland that wasn’t sprayed in glitter!
Here is what you will need
1. 18″ Green Foam Wreath – $6.99
2. 2 16″ Boxwood Garland -$16.99
(Michaels tip: use your Geo Coupon app for 40% off.. My husband was with me so of course we made two transactions to double our savings)
3. Hot Glue Gun
4. Toothpicks
5. Scissors
6. Bark, Ribbon, or Hook to hang.
7. ALOT of TIME!!
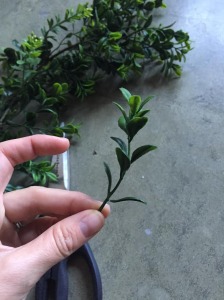
Step 1: Cut all the stems and I mean all of them of your garland! If you glue them in bunches, it looks really sloppy.
Step 2: Use toothpicks to punch holes in foam wreath. I angled the toothpicks.
Step 3: Use hot glue at the end of your stems.
Step 4: Replace toothpick hole with stem.
Tip:
1. I used at least three toothpicks at a time and left them in the holes so I could remember where all my holes were. I also used one toothpick in the back to keep my wreath elevated while working on it (this is helpful when you need to do the sides)
2. If laying on a window or door, you really do not need to fill the backside of the wreath.
3. I believe you could use a flat foam wreath to save money and time but it may not look as full.

TO SKIP ALL THESE STEPS AND PURCHASE A FAUX BOXWOOD WREATH:


