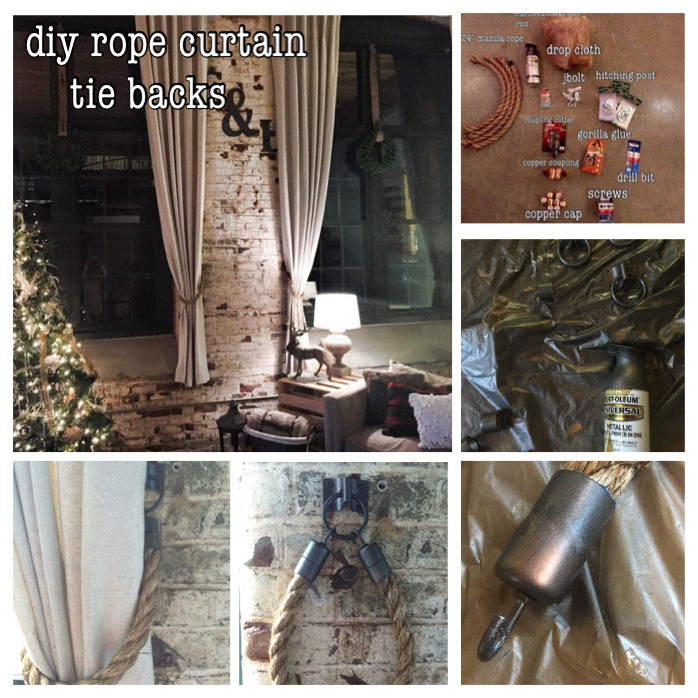
Good Weekend Everyone!!! We just got curtains made – which we have not had since we moved here – and we are so so happy!!!! The material is a natural linen with a metallic silver threading .. Just look at this!

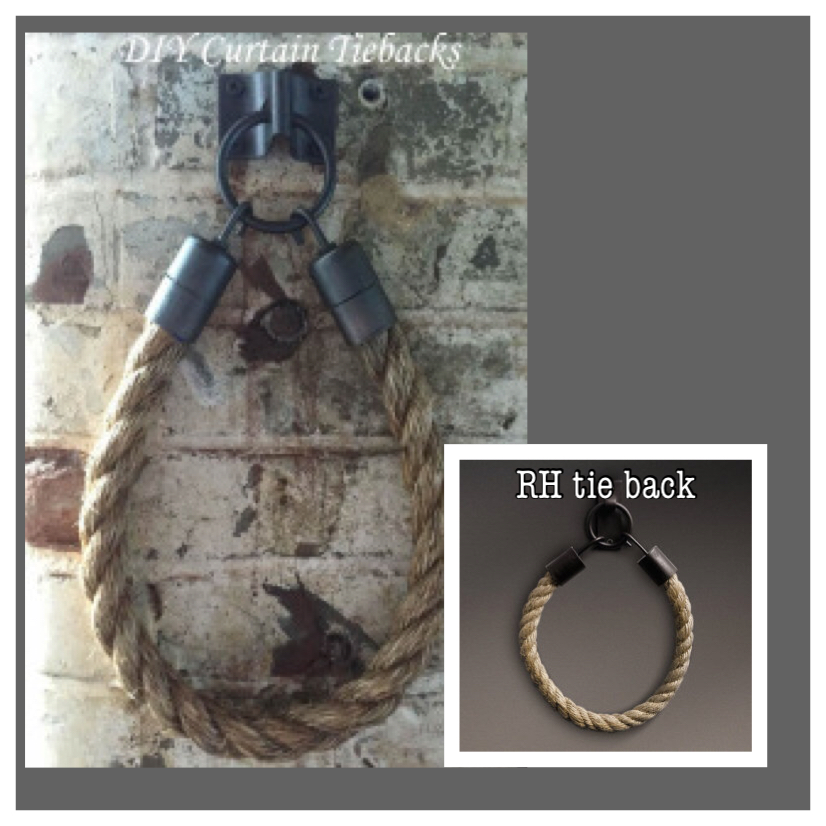
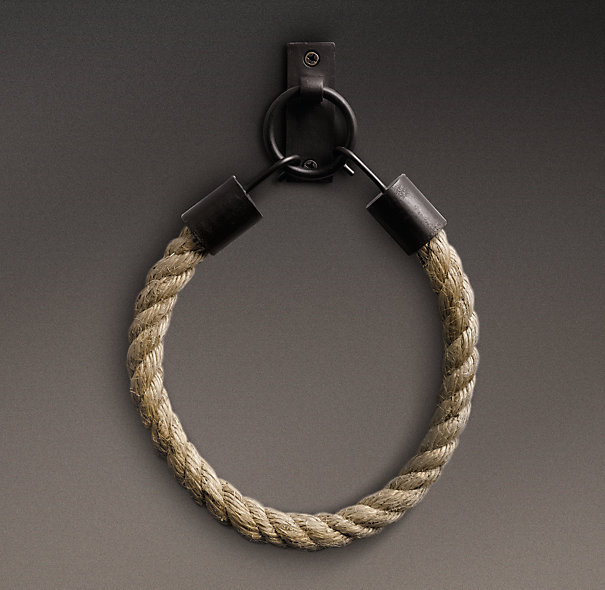
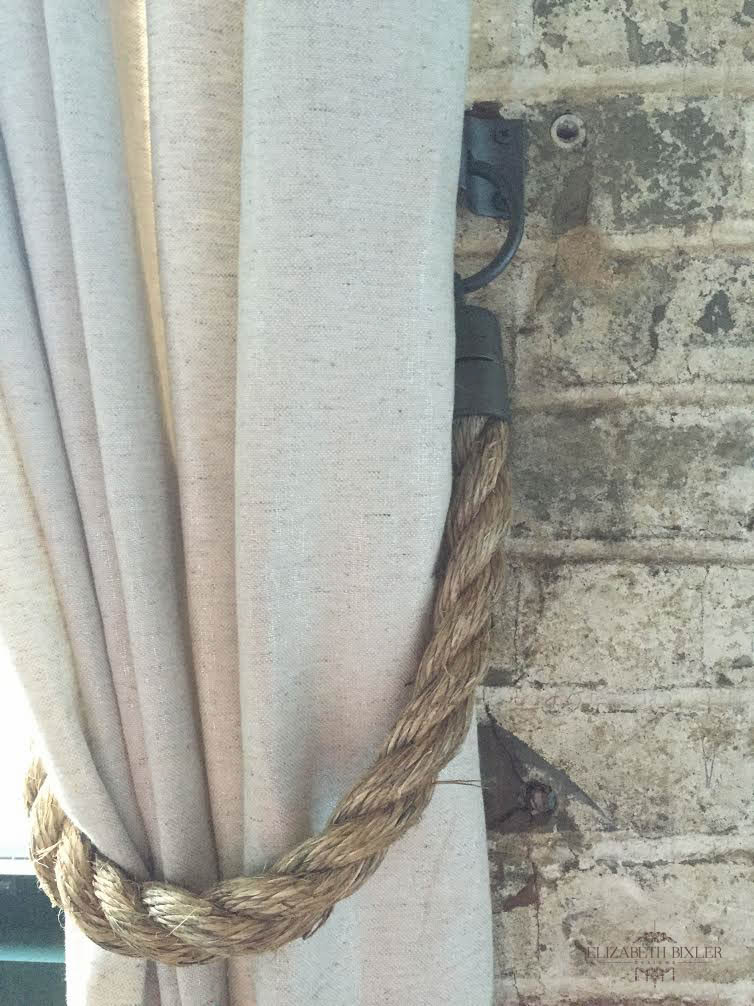
Okay.. now we need something to hold these babies back. We loved the Restoration Hardware Dakota Rope Drapery Tie-backs, but they were a little too expensive.
We needed 4 tiebacks = $280-$400!!
Needed
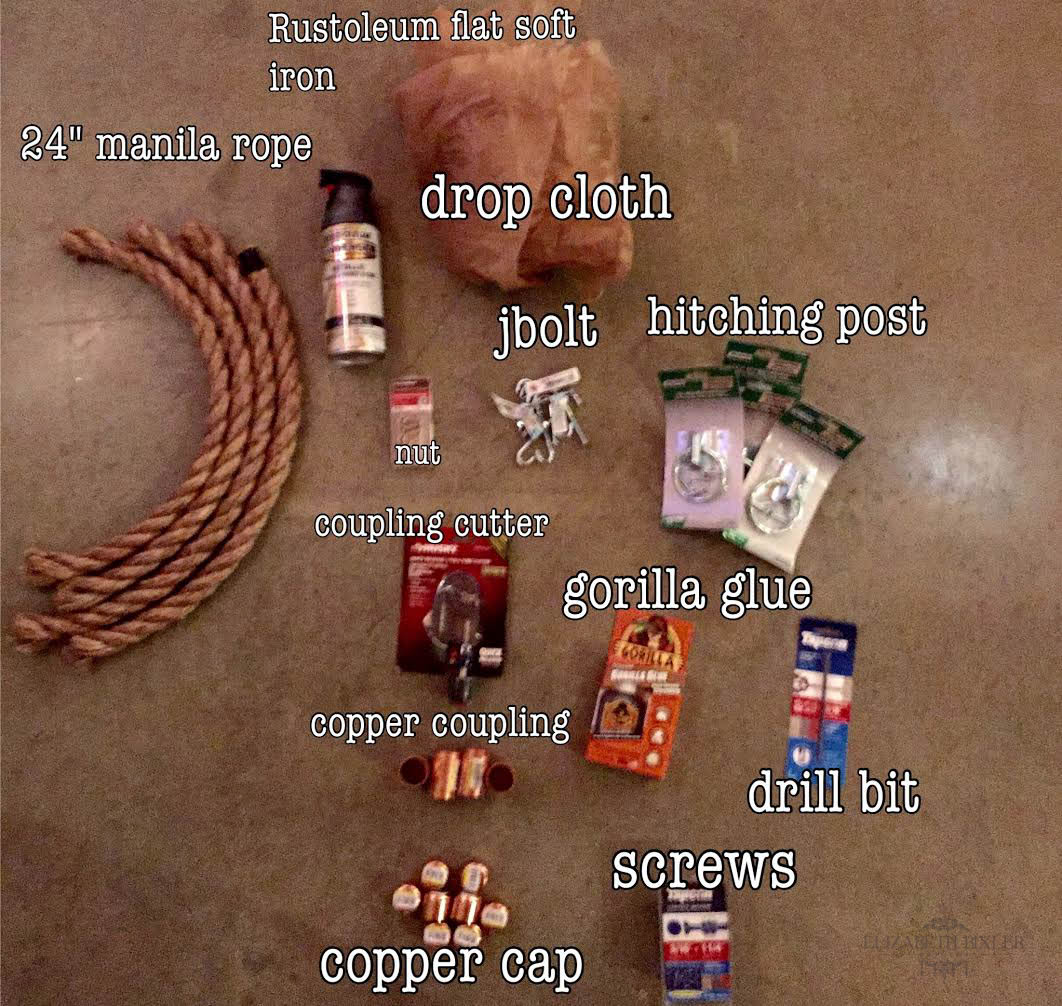
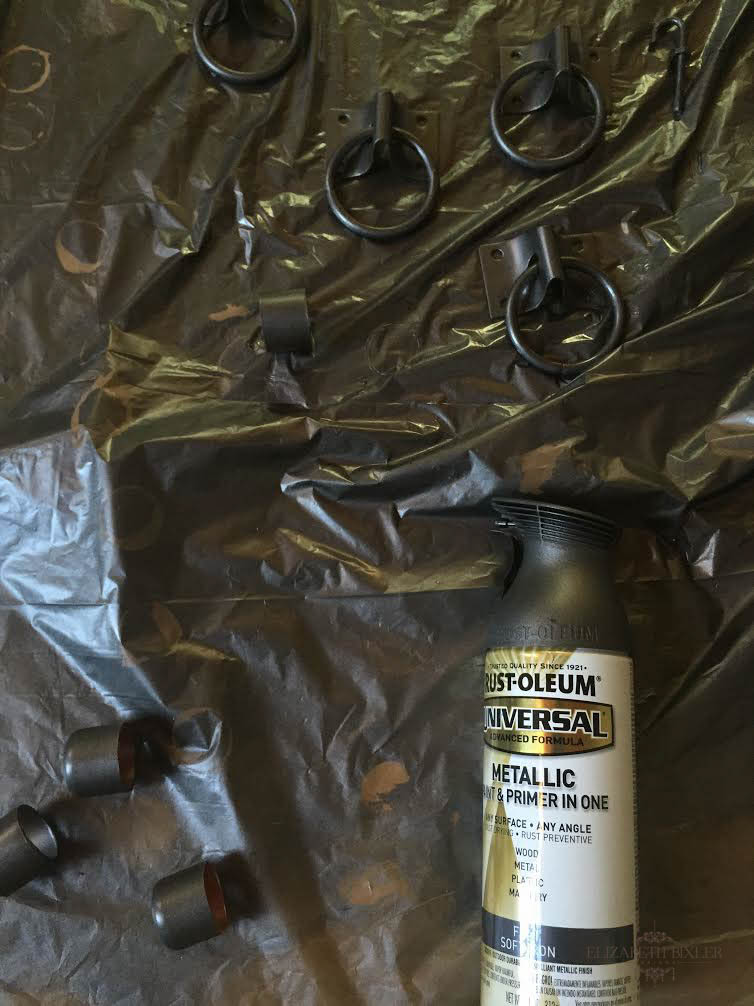
1. 4- 2″ hitching post rings -$13.12
2. 8- J-bolts – $4.64
3. 16 10-24 nuts to fit(8 if J-Bolt comes with nut) – $1.98
4. 8- 1″ Copper caps to fit rope diameter – $20.96
4. Rustoleum Universal Metallic Spray Paint and primer (Flat Soft Iron) -$6.76
5. 4 – 24″L 1″D manila rope – price per ft. $6.76 = $10.24
6. Gorilla Glue -$4.97
7. 4- 1″ Coupling $.45 each = $1.80 (we used copper but the link listed will be fine)
Extras:
8. 8 Concrete Anchors 3/16″x1-1/4″ (we had to drill into brick so you may just need normal screws) – $5.32
9. Drop cloth or newspaper for spraying
10. Pipe cutter (not needed if you do not want the coupling shorter) – $15.98
11. Drill bit (not needed if not drilling into brick) – $3.93
Total: $64.47 (Extras not included) – This is less than one from RH!
Instructions
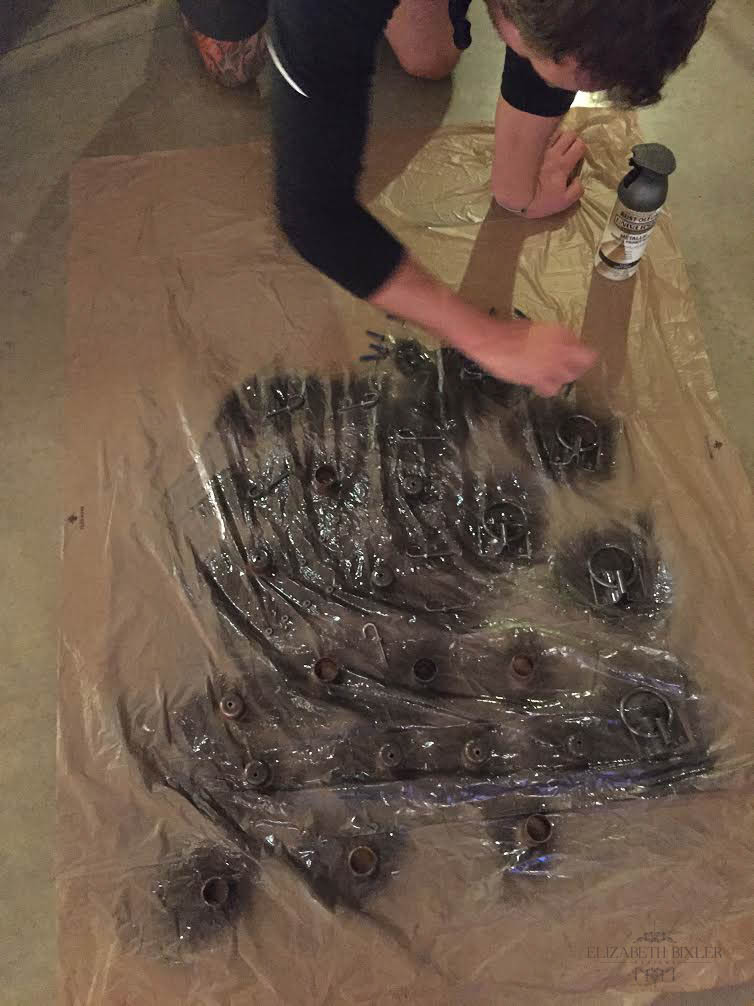
1. Cut couplings in half
2. Remove labels and clean so paint will adhere
3. Tape off rope so paint will not adhere
4. Tape ends of rope so it will not fray when putting through the coupling
5. Drill hole into copper cap using 3/16 drill bit (please ignore the off sided hole)

6. Spray all metal pieces with Rustoleum Flat Soft Iron
7. Wait for one night.
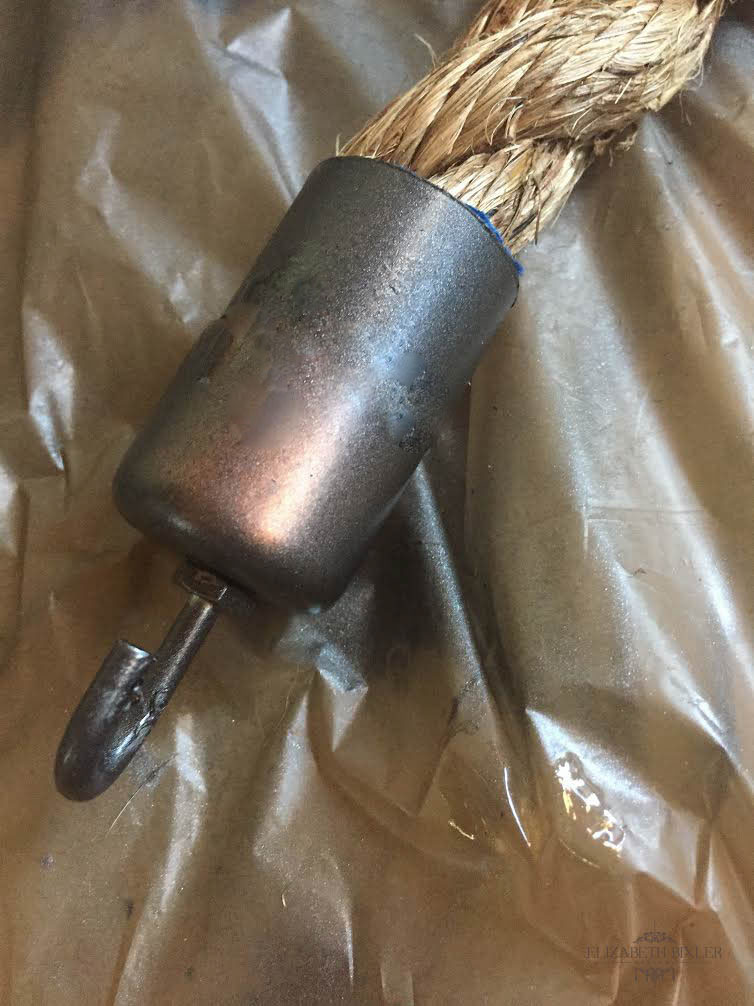
8. Screw the J-hooks in to the cap with the washer that comes with them on top, and a lock washer inside of the cap.
9. Place the coupling on the rope first, so that you can slide it up to the cap once you have applied glue. Apply glue to the top of the rope, as well as about 3/4″ down on the rope. Screw the cap with the J-hook into the top of the rope so it presses into the glue, while sliding the coupling up to it so they meet together flush. Repeat on the other side, as well as on the other tie-backs. Allow the couplings and caps to set over night.
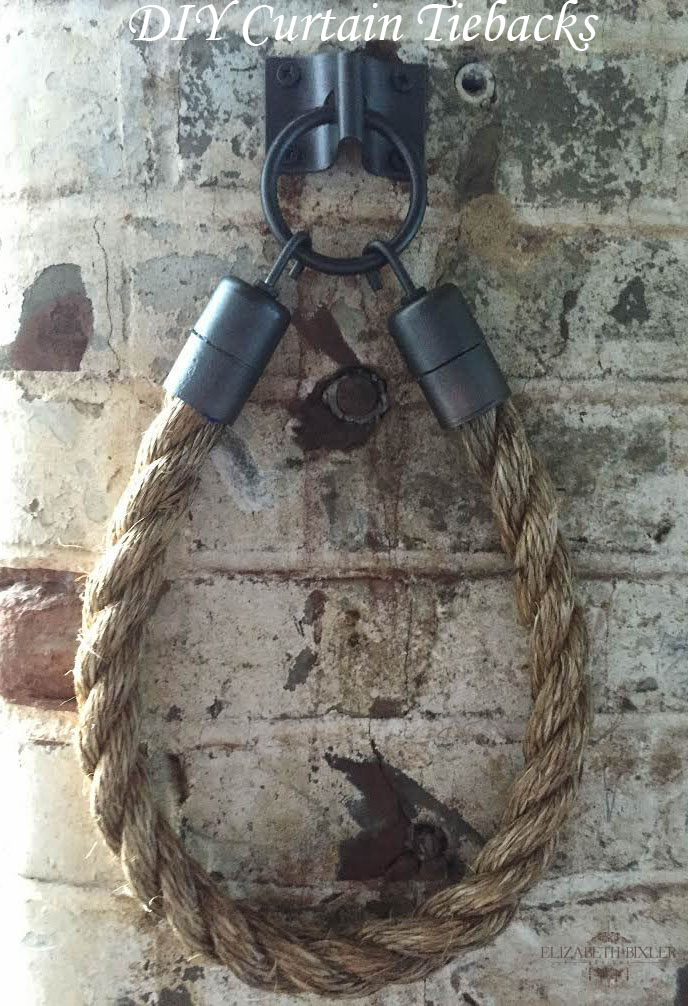

After
For any masonry questions please email me 🙂
[…] Country Curtain Tie Back With Rope […]