As a first time home builder, we had no idea what we were getting into with the process! I had talked to a lot of friends , real estate agents, and builders about things to look for when going to all the walk-throughs. Yes, there will be a few walk-throughs with new home building, and if there isn’t, you may have few problems. This is the only time you have control of what goes on in your home so the more you know before-hand, the better. One of our first walk-throughs was the electrical, lighting, and plumbing. Imagine trying to be prepared for all that! You will do this step prior to insulation and drywall. I have come up with a little new home building electrical walk-through checklist for you that I wish I would have had during mine. Before we start the list, here are a few tips:
Things to bring
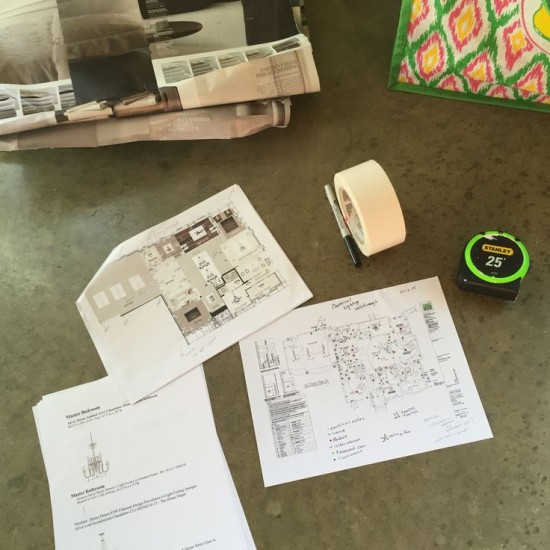
– furniture measurements, measurement tape, electrical and lighting layout mark-up sheet, marker, labels(or duct tape) for any changes
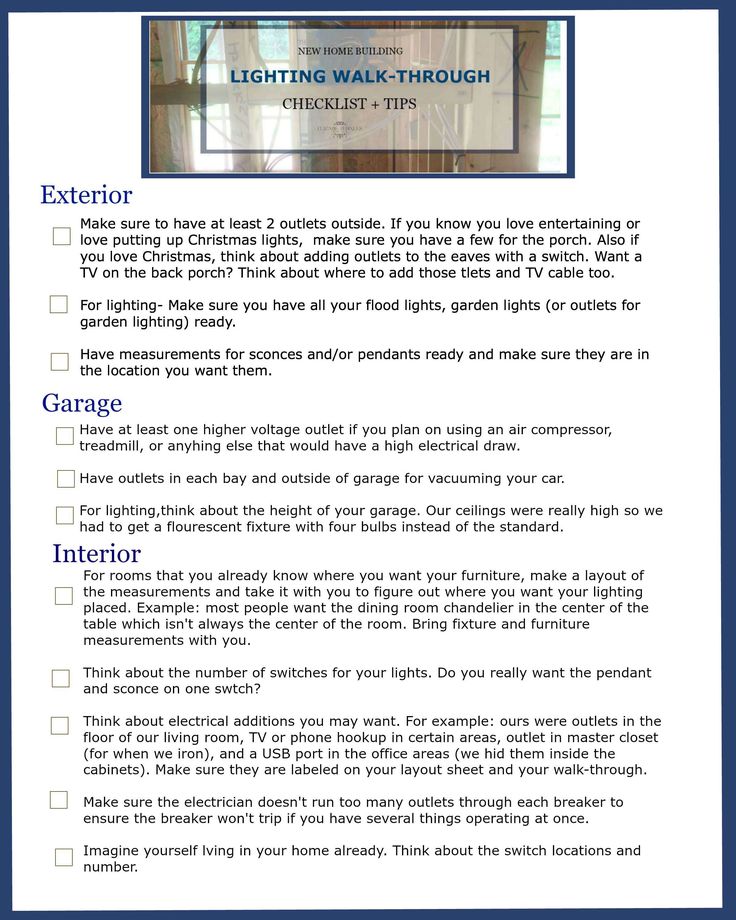
Your Checklist and Tips
1. Make sure do a walk-walk through a few times on your own first.
Some builders walk through very fast. I am super-detailed oriented when it comes to our house so I need a lot more time to look at everything.
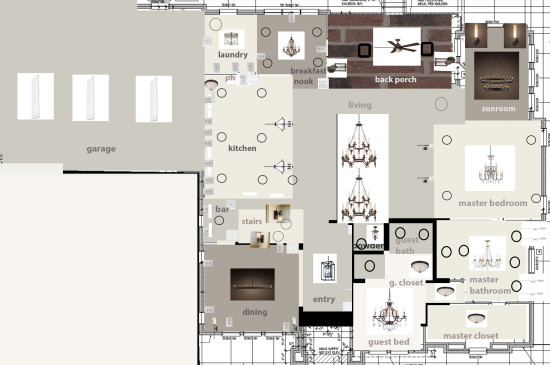
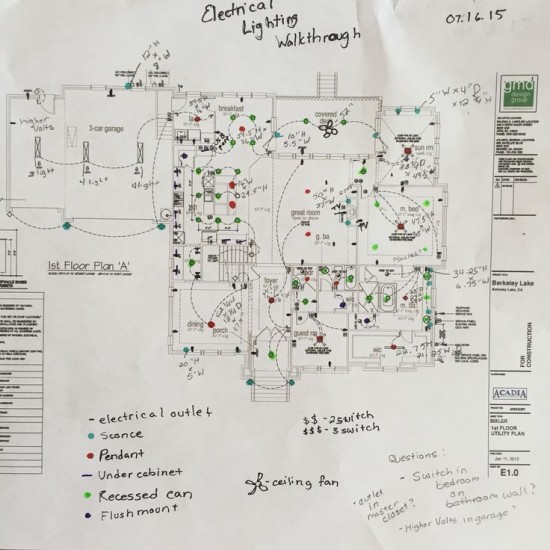
2. Print out a floor print of where you want your lighting and electrical outlets.
As I said before, some builders walk very fast. It is much easier to look on a picture layout than trying to read everything you wrote. Example:
I know it looks crazy right? It was more than helpful when the builder and I had a copy so we could easily reference it together to make sure we were on the same page. Another easier option is to print our your blank floor plan and draw circles where you want items. Use a red circle for pendant, green marker for recessed cans, blue marker for outlets, and so on. I also took a picture of our builder’s copy when he finished making all his markings to ensure we matched.
3. Make sure you know the location of your breaker box.
4. Have the dimensions of your lighting fixtures figured out.
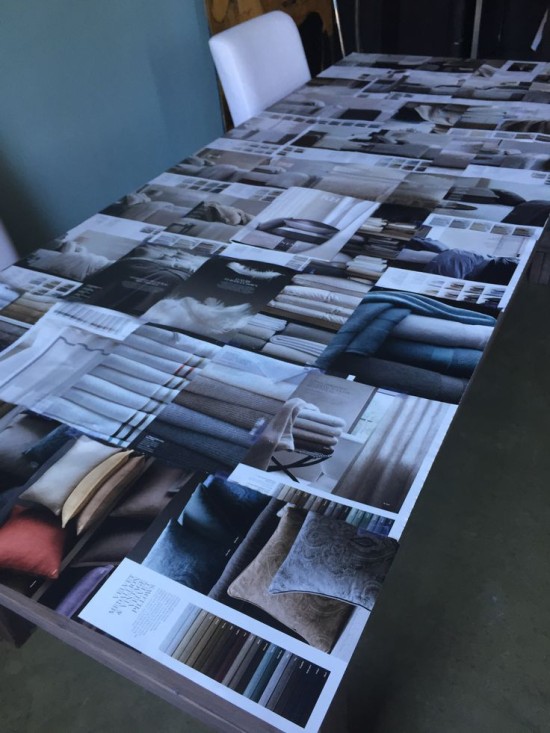
We taped magazine sheets together on our table then took the sheet to our home to make sure our dining room light was right over our table. You need to do this same method with your light fixture as well.
We had beams in a few rooms, and it caused a little problem in terms of symmetry with our chandeliers. We had to measure and make sure the fixture would fit in every room that had beams in the room.
5. How do you want your outlets sitting?
Some people like them sideways. Some people like them normal height. We wanted all of ours vertical and in the baseboard and the closest to the bottom. We did this because this was the closest we could figure that the wires would not show as bad. This about your bed placement and make sure you have an outlet close. I can’t tell you how many extension cords I have gone through in other homes.
6. Check the number of switches in every room.
Are there enough switches to every light you need? For example, do you really want your recessed cans and pendant on one switch? Also, think about how you will walk through your home. Imagine yourself coming in from a long day. Do you really want to have the light switch across the room? Prepare to look at that in each room.
7. Know that every addition will add up in cost.
I wanted sconces everywhere!! At $70 for every addition (not including the actual fixture), I calmed down a bit. Think about all your additions. Heated floors in the bathroom? USB ports in workspace areas? TV Wall Mount outlets? Do you want LED or Xenon under cabinet lighting? Adding outlets on the floors? It all adds up so think about what you can and can’t live without prior.
8. Take pictures of everything!!
Not only for fun but for reference when you are about to DIY or just in case the drywall guys accidentally cover it up.
9. Think about your kitchen lighting.
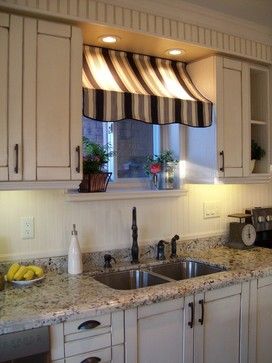
A lot of people I know have lighting above their sink. They also have a window above their sink and want a canopy to block the sun. The problem with that is the canopy also just reflects the light, and that is not cute. So think about that before, and same goes for the light above your range hood. Example:
10. Think about other types lighting.
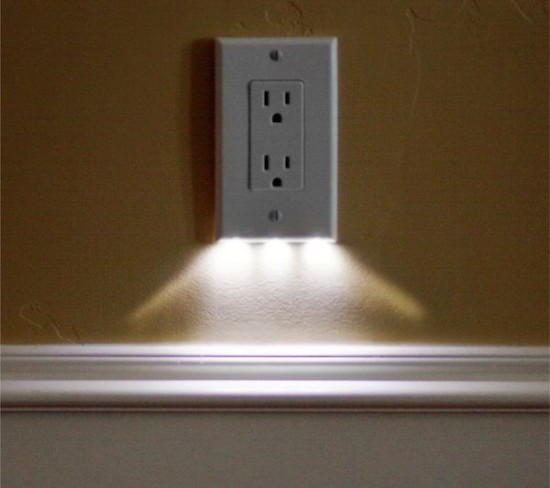
How much lighting will those incandescent bulbs really provide? We had to switch from 3 bulbs to 5 in our laundry room unless I wanted to fold clothes in sexy lighting. We had to switch from xenon to LED for our under cabinet lighting because of the colors looked better with LED. Also, think about your stair way lighting. I am terrified of stairs in general so I asked for outlets on the stair walls for night lighting. This is really an awesome idea by treehugger.com.
For more information on my interior design services, please visit my website.
Please leave a comment below if you have any extra tips I may have forgotten ! Thank you!!
[related_post themes=”flat”]
[comment-guestbook]
